Several features allow the user to create custom reports that the user can see from within the feature. During installation, several reports (InfoMaker .pbl files) are copied into default directories on the web server that these features access. You should update the location of the customized reports for the My Student Information feature.
Perform the following steps to configure J1 Desktop to support this feature.
1. Open the UI Configuration window.
2. From the Category Name drop-down list,
3. Choose AccountsReceivable.
a. Enter the appropriate values for the configuration items listed. These items are used for the Course and Fee Statement, which is accessed via the My Student Information feature. Right-click on the row to see an explanation of each item.
b. Click the Save button.
4. Choose offline_payment.
a. Enter the appropriate values for the configuration items listed. These items are used for payments made through JICS. Right-click on the row to see an explanation of the item. Example
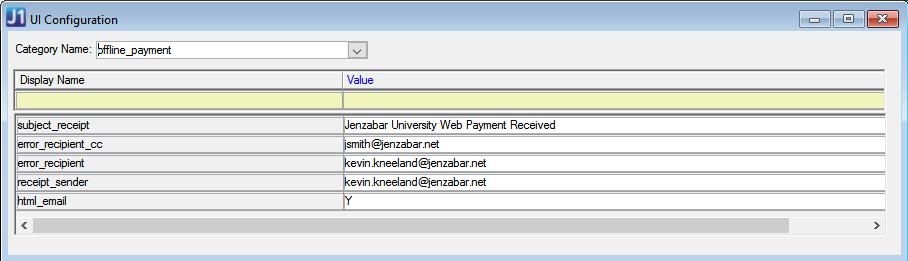
b. Click the Save button.
5. Choose online_payment.
a. Enter the appropriate values for the configuration items listed. These items are used for payments made through JICS. Right-click on the row to see an explanation of the item. Example
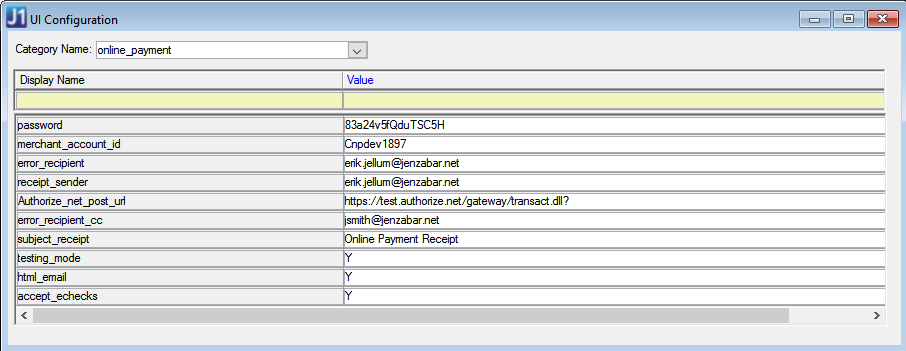
b. Click the Save button.
